

Note: This tutorial was first published in 2020 and updated in April 2026 for current product naming. EPBCS is now delivered as part of Oracle Fusion Cloud EPM Planning (Enterprise edition), and Data Management is now Data Integration, reached from the Data Exchange card on the Cloud EPM home page. Some screenshots below show the classic Data Management interface; the concepts and the EPM Integration Agent workflow are unchanged.
Out of the box, Oracle EPM Cloud's native source connections are oriented toward Oracle systems and files. The EPM Integration Agent extends that reach to non-Oracle sources, letting you query a relational database such as an Azure SQL Database and load the results directly into your Planning application.
For this tutorial we created an Azure SQL Database to hold bank account records, along with a .NET web app that mimics an ERP data-entry system: a new account is entered on a web form and inserted into a customer table in the Azure database. We then use the EPM Integration Agent to pull the new records into Oracle EPM Planning (EPBCS) through a direct connection to Azure.
SQL Server Management Studio
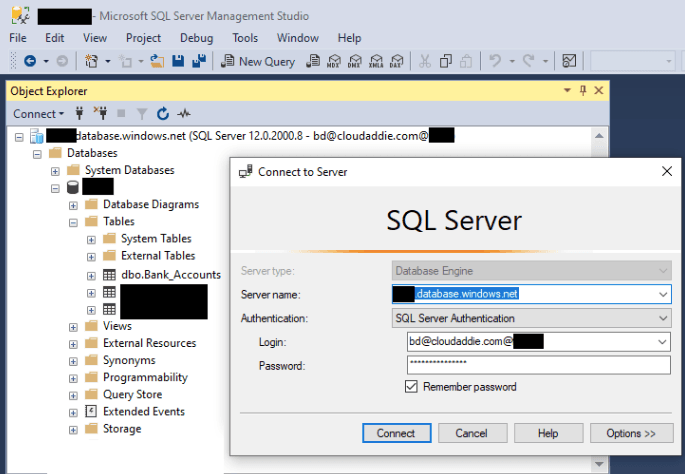
In SQL Server Management Studio, we connected to the Azure SQL Database and ran a query that returns the eight sample records currently in the database.
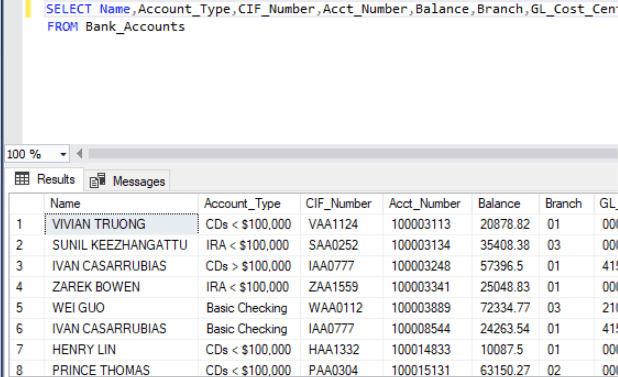
This same SQL statement will be reused in Oracle EPM Planning to define the query in Data Integration.
Adding a New Bank Account in the Web App
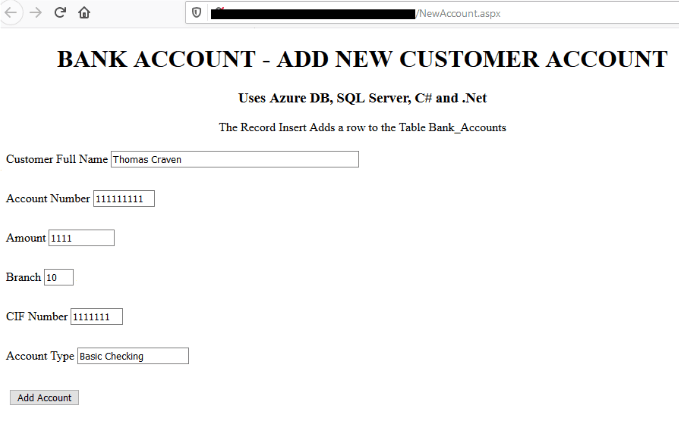
From the web app, we add a record for a fictional customer, Thomas Craven. Using account number 111111111 and Customer Information File (CIF) number 1111111, we create a new bank account with an opening deposit of $1,111.
Confirming the Insert to Azure SQL Database
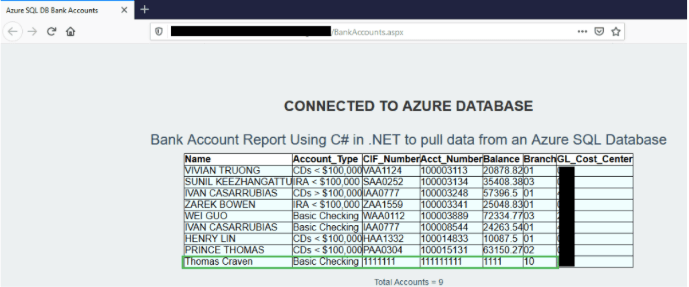
Refreshing the web app, which reads from the Azure SQL Database, we can see the new record has been added, bringing the total to nine records.
Register the Azure Database as a Data Source
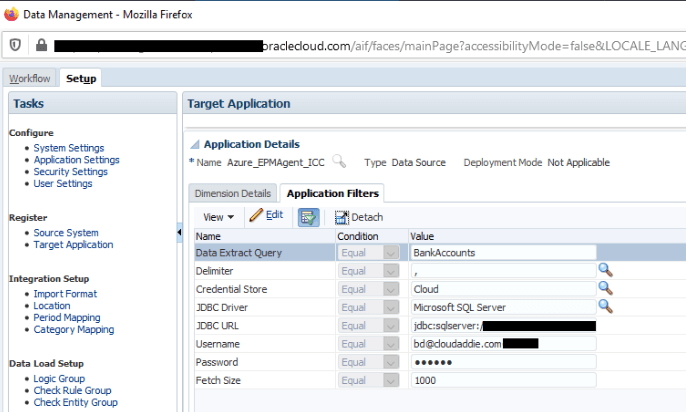
To bring the Azure data into EPM Planning, we register the database as a data source. In current Data Integration this is an application with the category Data Source and the type On Premise Database; in the classic Data Management interface shown here, it is a Target Application with Application Filters.
The "BankAccounts" query mirrors the SQL we ran in SQL Server Management Studio. The JDBC driver is Microsoft SQL Server, and the JDBC URL points to the Azure SQL Database, in the form jdbc:sqlserver://server:port;DatabaseName=dbname. For SQL Server sources, the Microsoft JDBC driver is placed in the agent's lib folder and registered in the agent's configuration so the agent can make the connection.
Create the Integration
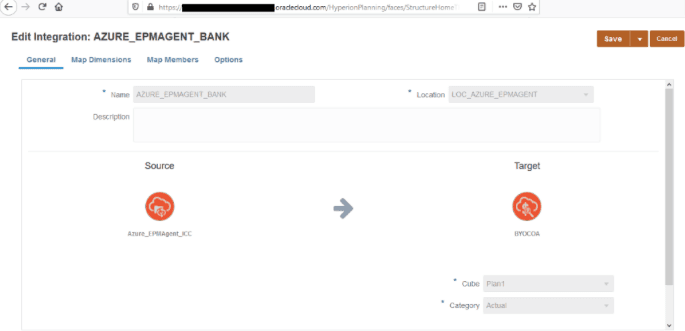
We select the source and target systems, then specify the Location, Cube, and Category. After mapping the dimensions and members, we are ready to start the EPM Integration Agent from the command line. The agent can also be launched and orchestrated with EPM Automate so the whole load runs unattended.
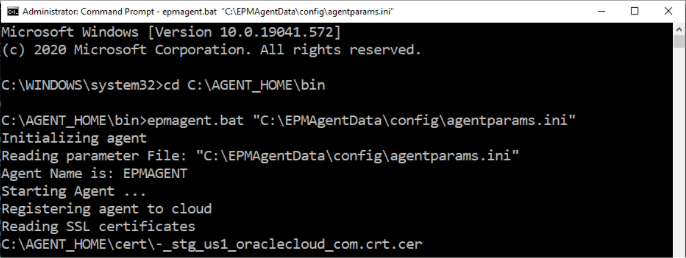
Once the agent has established a secure connection to Oracle EPM Planning, we can run the data load rule that pulls the nine records from the Azure SQL Database and stages them in the application.
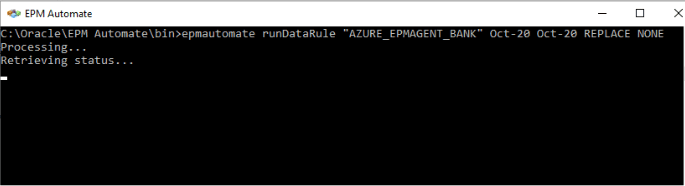
For this example we run the data load rule named "AZURE_EPMAGENT_BANK" for October 2020. After the load completes, we can confirm that all nine records were pulled from the Azure SQL Database and mapped correctly.
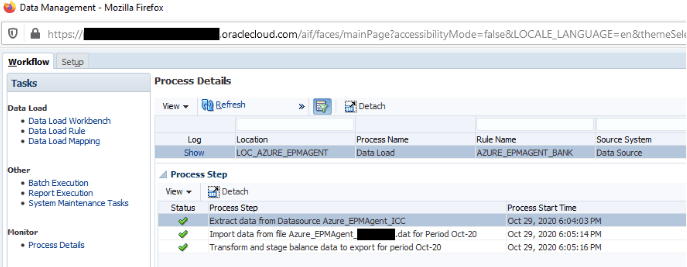
Using only a header file, the agent extracts the records from the Azure SQL Database into a .dat file. If you have loaded data from Oracle ERP Cloud before, you will recognize the green check marks confirming that the file was successfully extracted from the source system.
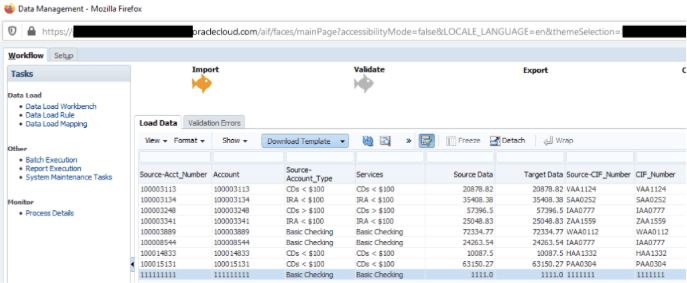
In the Workbench, we can confirm that the data has been imported, transformed, and staged, and is ready for validation and export. The new record for Thomas Craven is highlighted, carrying account number 111111111 and CIF number 1111111.
Additional Resources
If you are newer to SQL, a good place to start is this SQL overview.