
Finance teams often spend significant time building forecasts, reviewing assumptions, and adjusting spreadsheets. Oracle Intelligent Performance Management (IPM) Auto Predict helps streamline that process by using historical data to generate predictive values directly within Oracle Planning.
This guide walks through the complete configuration, from defining the prediction calendar and data slices to running the Auto Predict job and reviewing the results. The example uses 36 months of historical Actual data to generate a six-month forecast for July through December FY26.
For where Auto Predict sits alongside the other IPM capabilities, see Oracle IPM Insights: what it actually does.
Prerequisites
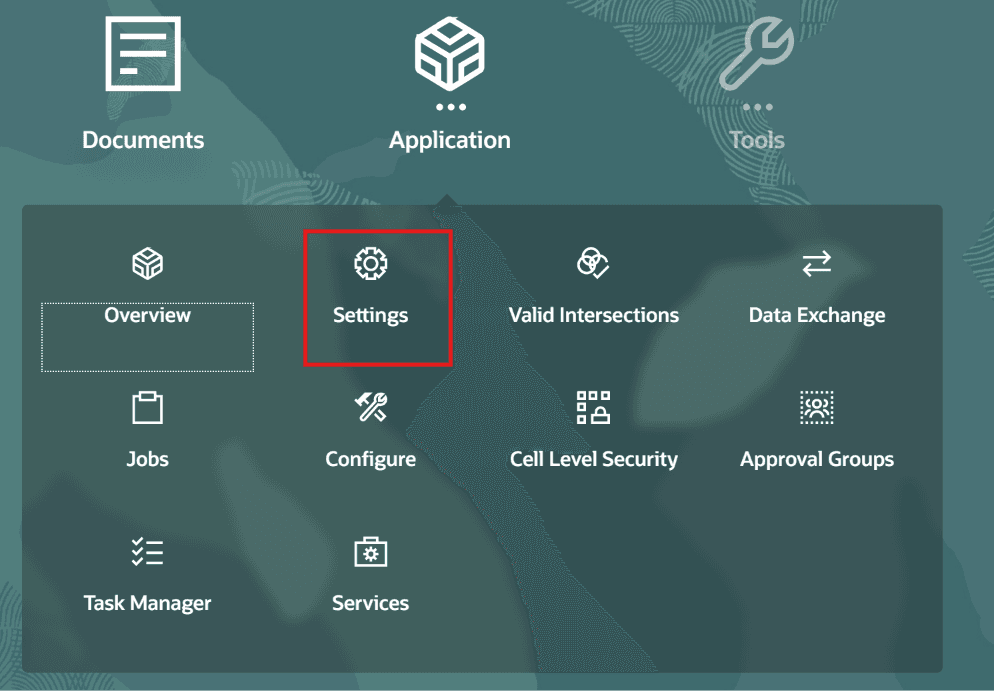
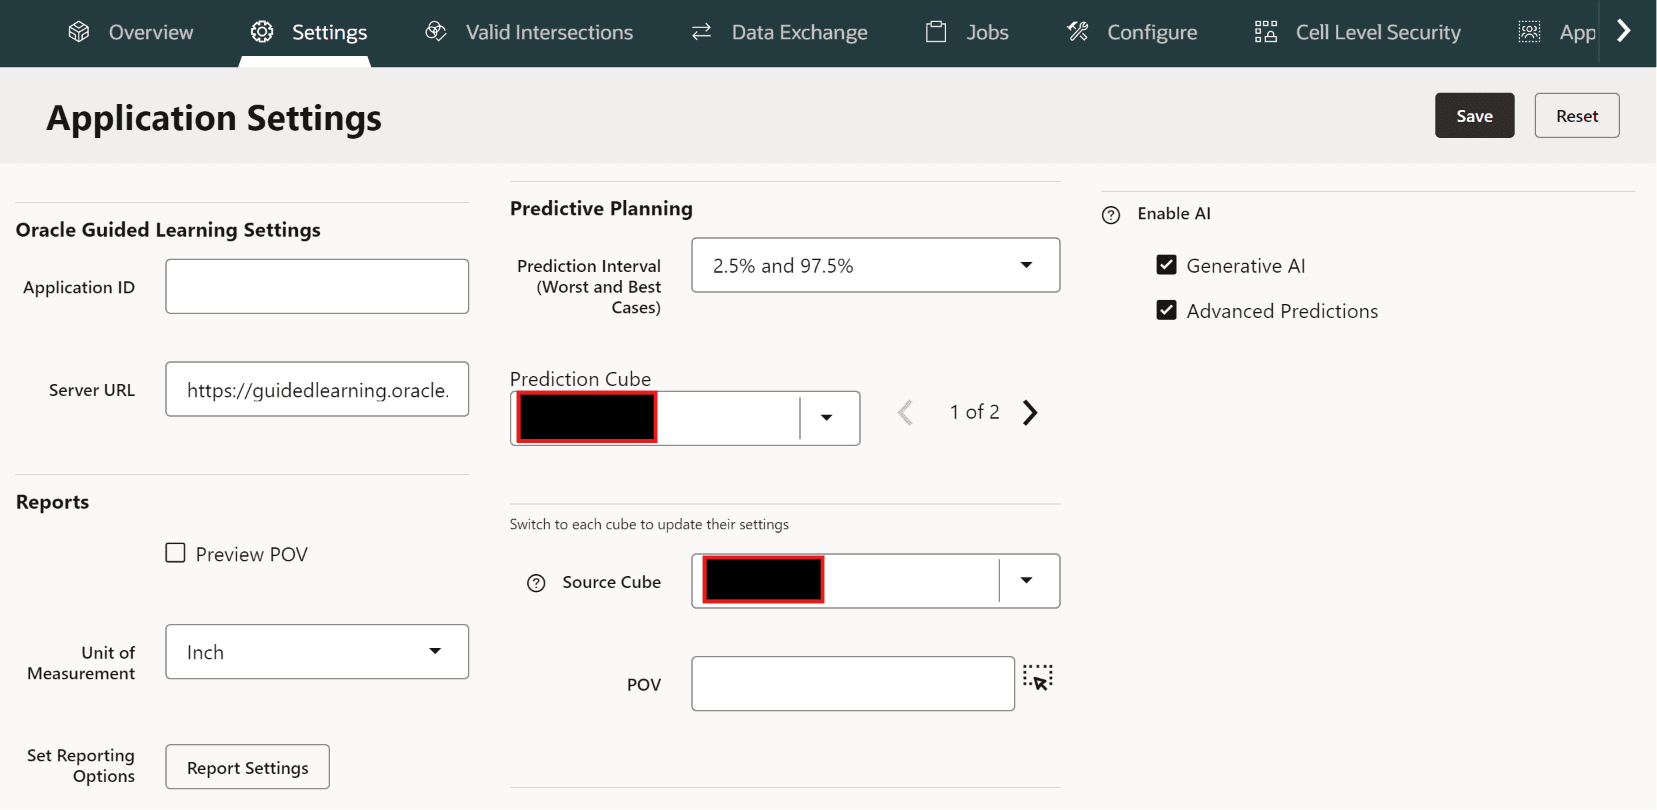
- Enable Generative AI and Advanced Predictive capabilities to unlock all Machine Learning and AI features.
- Set your prediction cube and reporting cube.
- Click Save.
What Is Auto Predict?
Auto Predict analyzes historical time-series data and generates future predictions without requiring the administrator to manually choose a statistical forecasting algorithm. The administrator defines the calendar, selects the relevant data intersections, configures prediction options, and runs the IPM job.
- Uses historical data already stored in Oracle Planning.
- Supports automated, repeatable forecast generation.
- Reduces dependence on manually maintained forecasting formulas.
- Allows predicted results to be reviewed alongside existing forecast data.
1. Configure the Prediction Calendar
The calendar controls the historical periods used to train the prediction model and the future periods for which predictions will be generated.
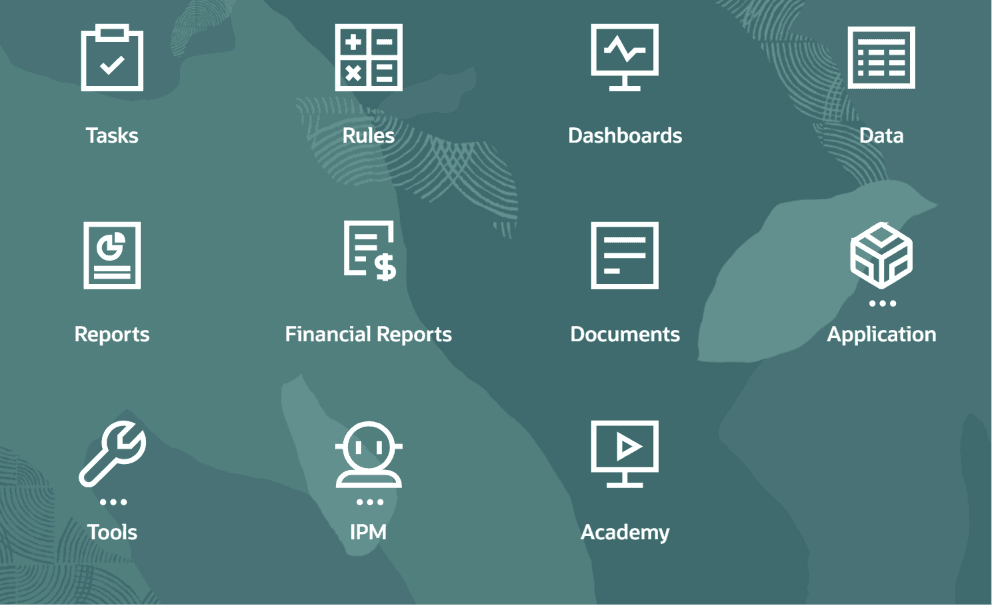
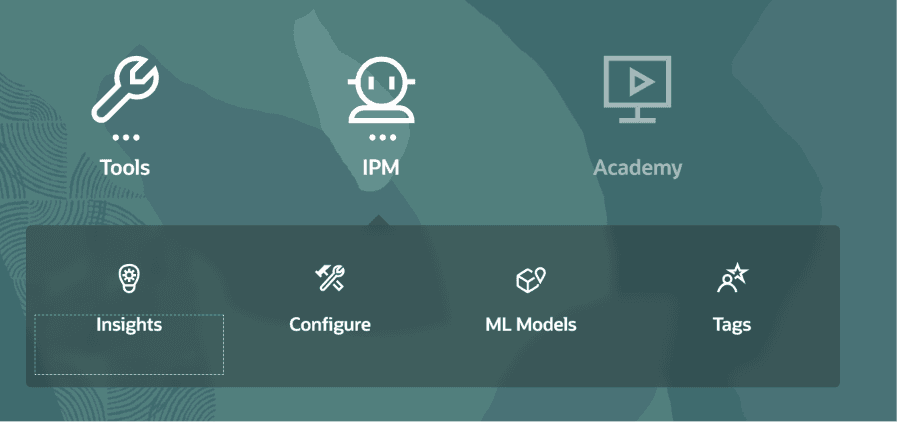
- From the Oracle Planning home page, open IPM.
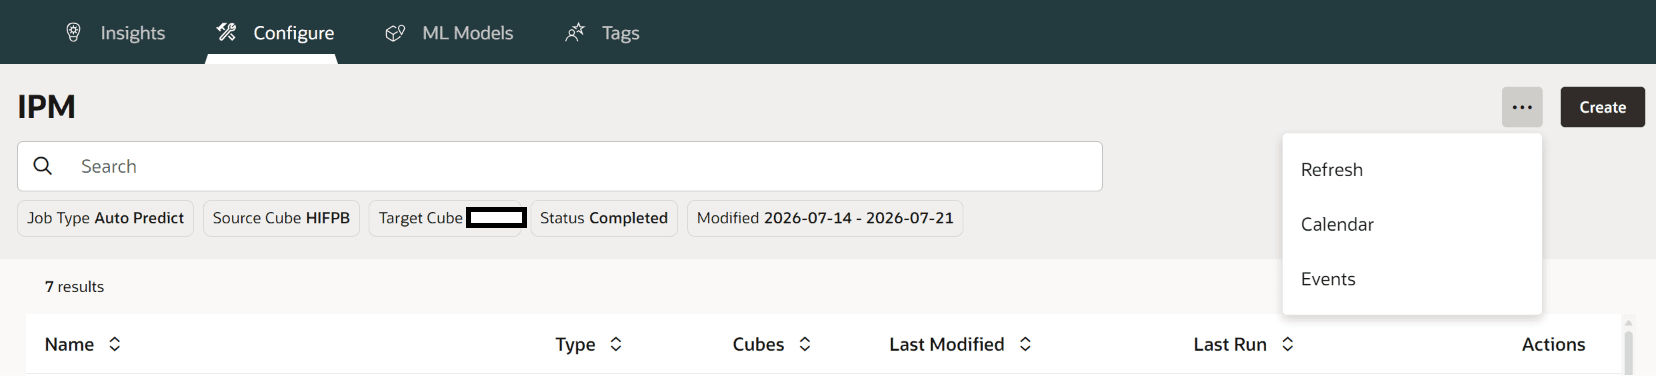
- Select Configure, open the Actions menu, and choose Calendar.
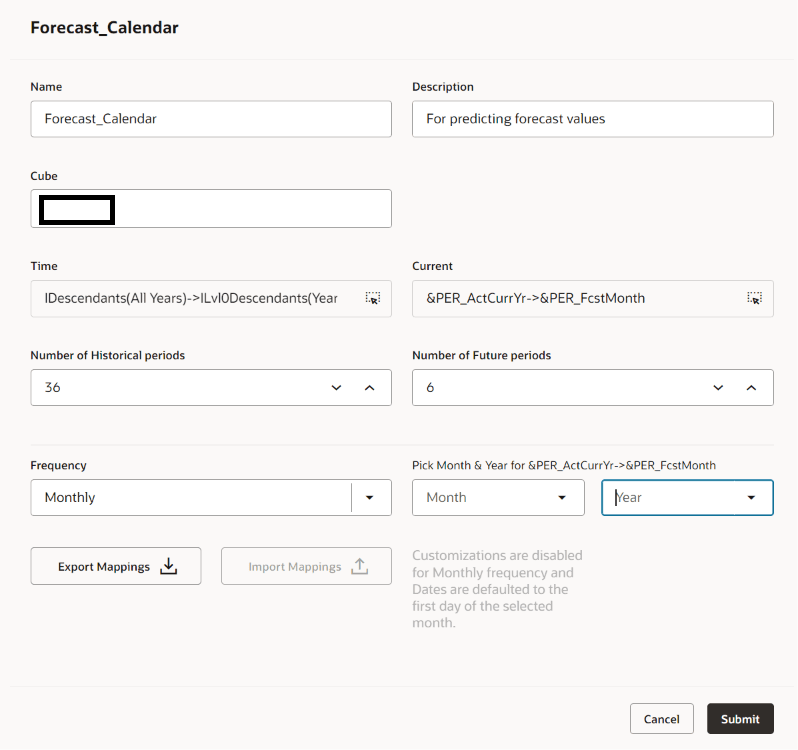
- Create a calendar and provide a meaningful name and description.
- Select the cube to which the calendar applies.
- Define the complete time range, the current period, the number of historical periods, and the number of future periods.
- Save the calendar.

Implementation tip: Use substitution variables for the current Year and Period where possible. This allows the calendar to advance with the application period and avoids a manual calendar update every month.
The Time selection must include the entire historical and future range. The period immediately before the configured Current period becomes the final historical period used for model training. The number of historical and future periods must remain within the range defined for the calendar.
2. Create the IPM Insight
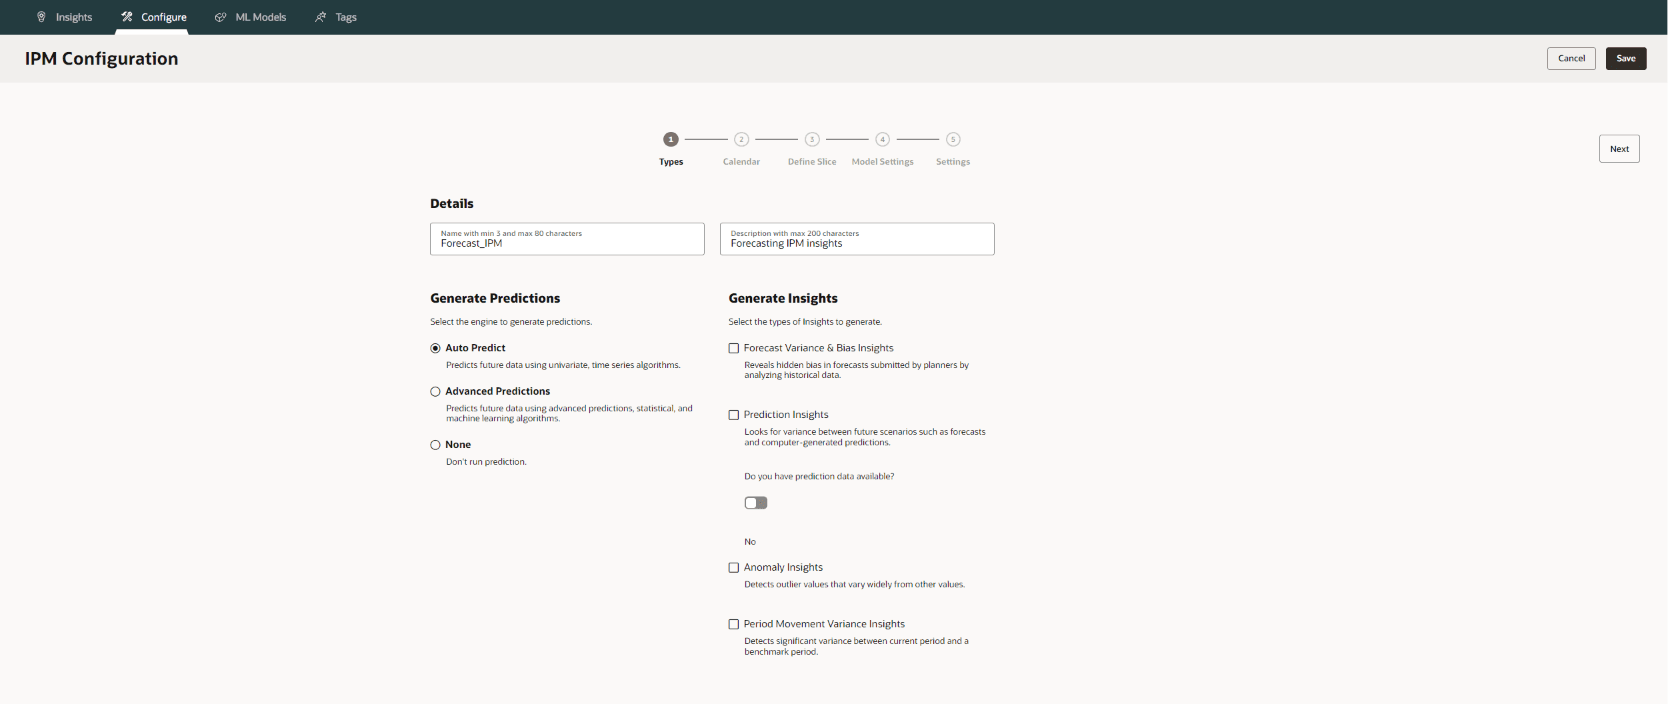
After the calendar is available, create an IPM configuration and select Auto Predict as the prediction method.
- Return to IPM and select Configure.
- Select Create.
- Enter an Insight name and description.
- Under Generate Predictions, select Auto Predict.
- Select any additional insight types required for the use case.

3. Define the Data Slices
Data slices identify the intersections used for model training, prediction storage, and forecast comparison.
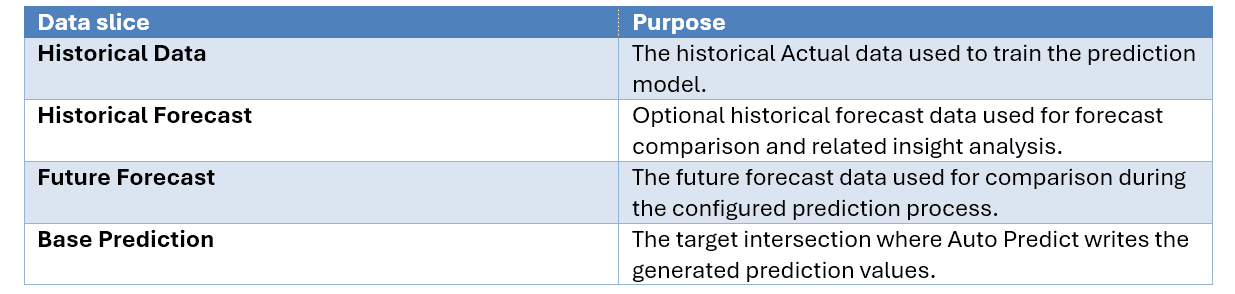
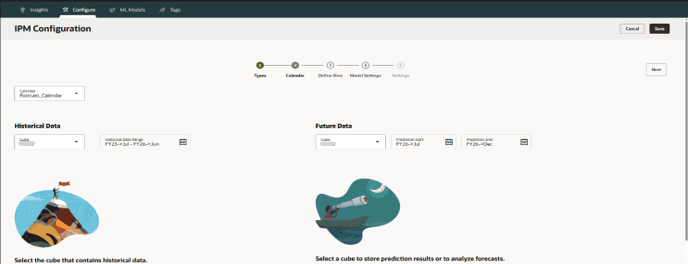
- Select the historical-data cube and the future-data cube.
- Define the historical data and base prediction intersections.
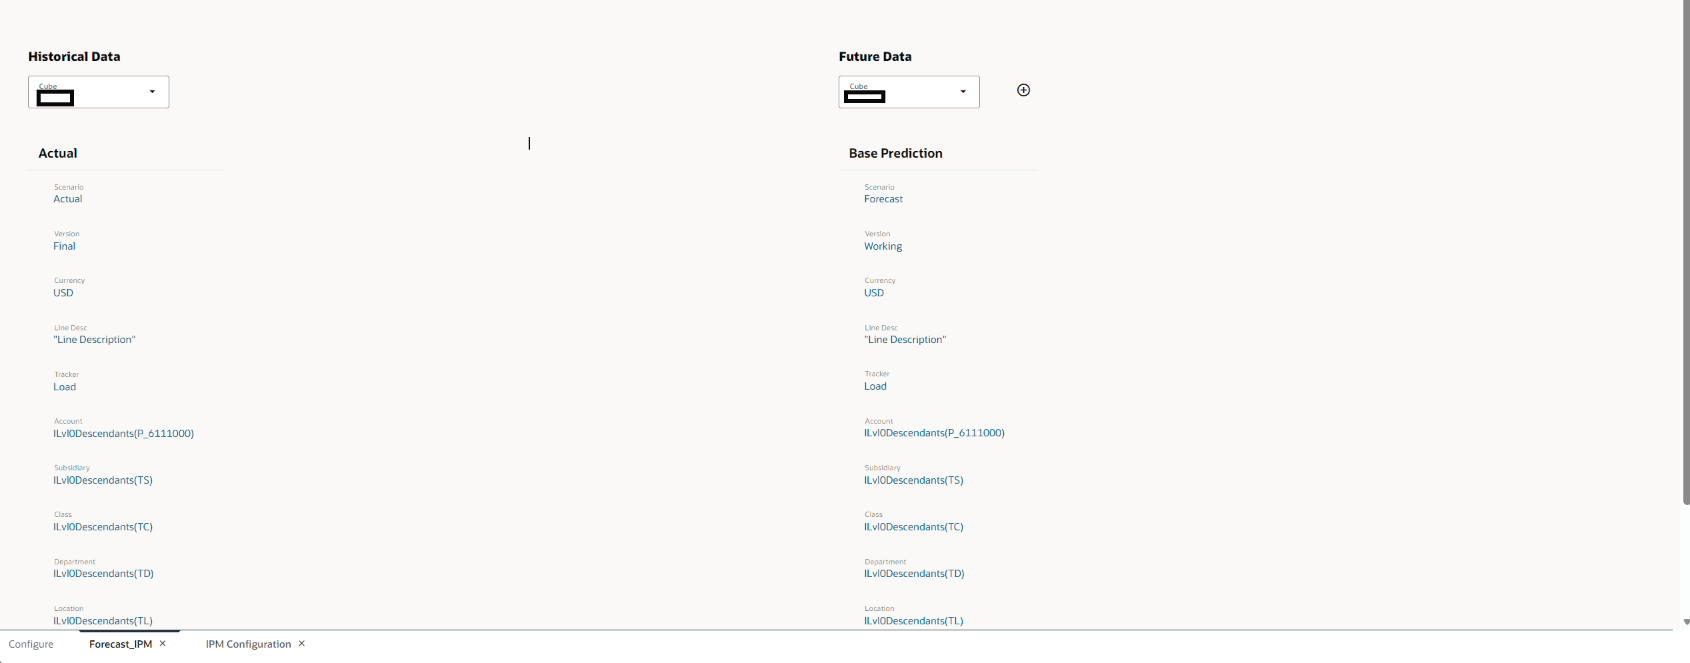
Data-quality checkpoint: Every selected intersection must contain valid data for the periods defined in the calendar. Missing, inconsistent, or highly irregular data can reduce the usefulness of the generated prediction.
4. Configure Auto Predict Options
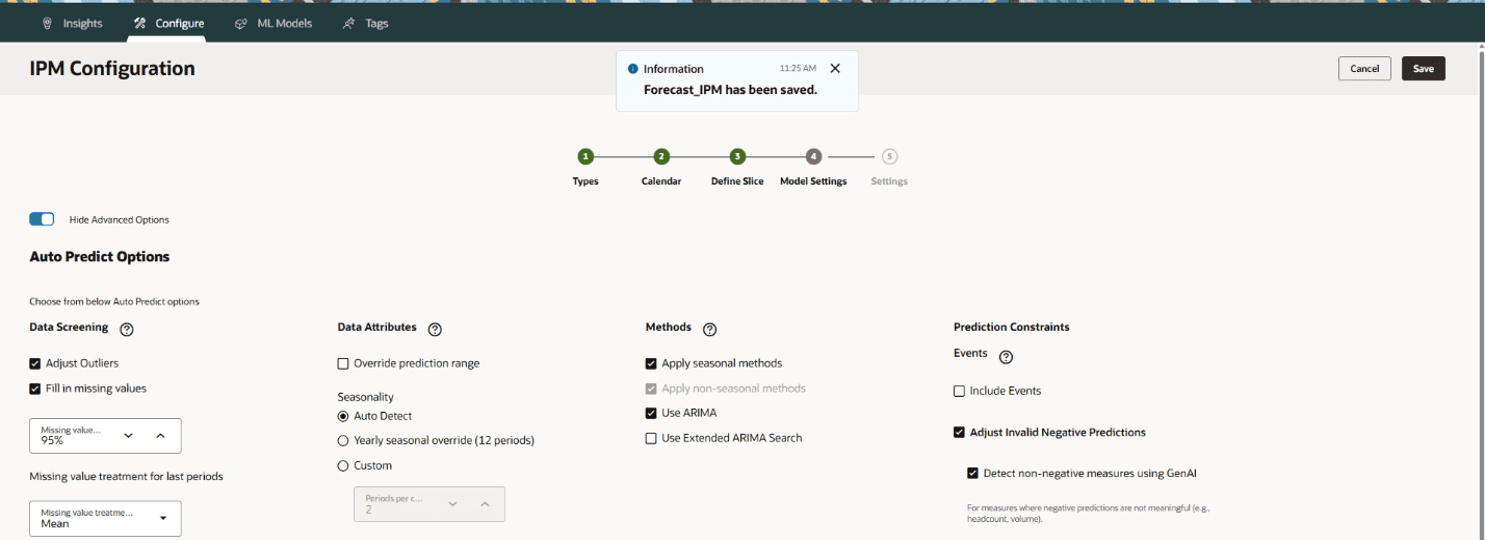
The Model Settings page controls how Auto Predict handles seasonality, missing values, outliers, methods, and prediction constraints. The appropriate settings depend on the behavior of the selected data.
- Review data-screening options for missing values and outliers.
- Use automatic seasonality when the data may contain recurring monthly or quarterly patterns.
- Review available method settings and prediction constraints.
- Use advanced options only when the business requirement is understood and the results can be validated.
5. Save and Run the IPM Job
After the configuration is complete, save the IPM definition and run the job from the Actions menu. The job status can be monitored directly from the IPM configuration page.
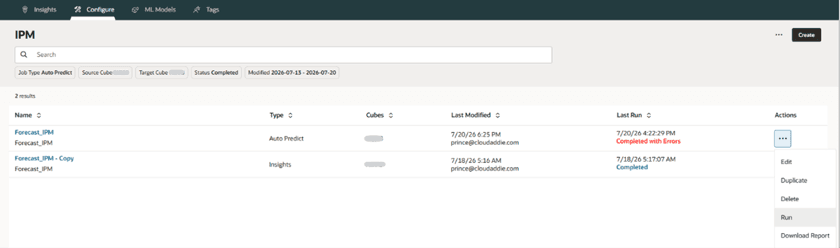
- Open the Actions menu for the Auto Predict configuration and select Run.

- Confirm that the Auto Predict job completed successfully.
6. Validate the Forecast Results
A successful job does not automatically mean the forecast should be accepted without review. Compare the generated predictions with historical Actuals, existing forecasts, known business events, and operational expectations.
Example Outcome
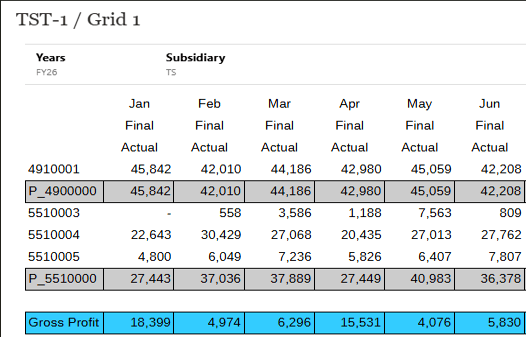
In this example, the model uses 36 months of historical Actual data for the selected account hierarchy. The historical values show Revenue (4910001) and the Direct Cost accounts (5510003, 5510004, and 5510005), with the parent totals calculated accordingly.
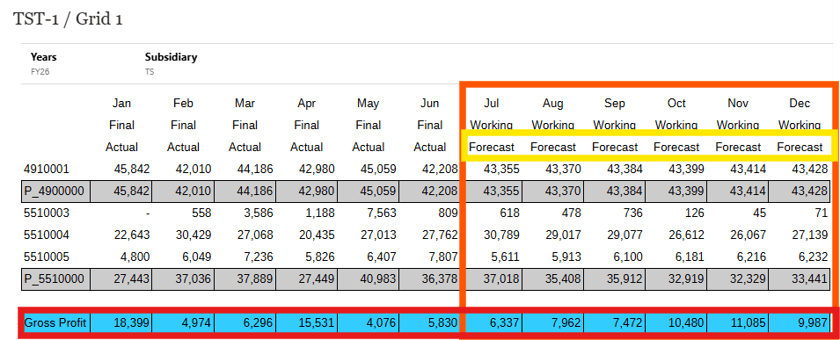
Auto Predict then generates Forecast values for July through December FY26 in the Working version. The forecasted direct-cost values roll up to P_5510000, while the forecasted revenue rolls up to P_4900000. Gross Profit is then calculated from these forecasted account values and displayed for the same future periods.
This provides a single view of historical Actuals and future Forecast values, allowing the finance team to compare the predicted results with historical performance and assess whether the forecast is reasonable before using it in the formal planning or forecasting process.
Best Practices
- Use sufficient history, typically 24 to 36 months for monthly data when available.
- Confirm that the historical period range is complete before running the job.
- Separate one-time events from recurring trends where practical.
- Validate predicted values at both detailed and summarized levels.
- Compare Auto Predict results with the existing business forecast.
- Document overrides when business judgment differs from the statistical prediction.
- Use substitution variables to support a repeatable monthly forecasting process.
Common Mistakes to Avoid
- Using too little historical data.
- Selecting incomplete or invalid data intersections.
- Defining a calendar range that does not include all required periods.
- Writing predictions to the wrong Scenario, Version, or member combination.
- Assuming that a successful job automatically means the forecast is business ready.
- Ignoring material business events that are not reflected in historical patterns.
Where Auto Predict Adds the Most Value
Auto Predict is especially useful for accounts or operational measures with consistent historical behavior, recurring seasonality, or stable trend patterns. Common applications include operating expenses, revenue, headcount-related costs, demand, volume, and cash-flow drivers.
It is less effective when the business has undergone a major structural change, when historical data is sparse, or when future results depend primarily on events that do not appear in the historical record.
Conclusion
Oracle IPM Auto Predict gives finance teams a practical way to bring machine learning into the forecasting process without building custom statistical models outside Oracle Planning. When the calendar, data slices, and prediction options are configured correctly, the process can produce repeatable forecast values that complement planner judgment and improve forecast discussions.
The strongest implementation is not simply one that generates a prediction. It is one that combines reliable data, thoughtful configuration, and disciplined business validation.