


Creating Custom Reports with BI Publisher

By: CloudADDIE
Published: October 11, 2019
In this tutorial, we will provide step by step instructions on how to create a simple custom report in OBI. For more information on the table breakdown in Oracle Fusion, please refer to the tutorial called "Creating Custom Reports with BI Publisher - Table Structures".
All OBI reports are linked to a data model which holds all the data used in the report. In order to create report, we must first create a data model, and extract the data from the fusion tables using SQL.
Creating the Data Model
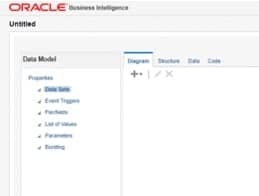
Step 1 - Select "data model" from the new dropdown menu.
Step 2 - After doing so, we now see a list of properties on the left side that we can customize for the data model. For example, we can use the parameters property to add parameter selections to the report. For today's example, we will only use the data set property.
Step 3 - Click on the + sign under the diagram tab and select SQL Query. A window will pop up for this data set. For the purpose of this demo, I have named this set "Invoice", and selected FSCM as its data source.
Step 4 - I will then input a simple query that will pull all the data in this AP invoices table (below in the text-area), then click okay.
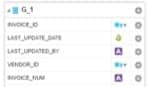
Step 5 - A list with the columns that are stored in the Invoice table will be generated. Now suppose I need a report that shows me all the invoices that had an unpaid value (or values of "N" in column Payment_Status_Flag). How would I go about getting this information?
Step 6. Click on the cog wheel on the top right hand of the data set. Select “edit data set”. This will take us back to the area where we input the SELECT * SQL statement above. This time, we will modify it to pull only the columns we need and apply a filter for only unpaid invoices.
SELECT INVOICE_NUM, INVOICE_DATE, INVOICE_AMOUNT, PAYMENT_STATUS_FLAG FROM AP_INVOICES_ALL WHERE PAYMENT_STATUS_FLAG = 'N'
Step 7. Click OK. NOTE: You will see that this has reduced the size of our dataset to only the fields we have specified.
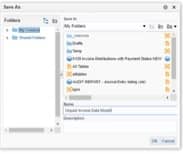
Step 8. Click on the save icon in the top right corner of the work area. Be sure to give it a name you will remember, and then click OK. In my example, I have saved it to "My Folder" only.
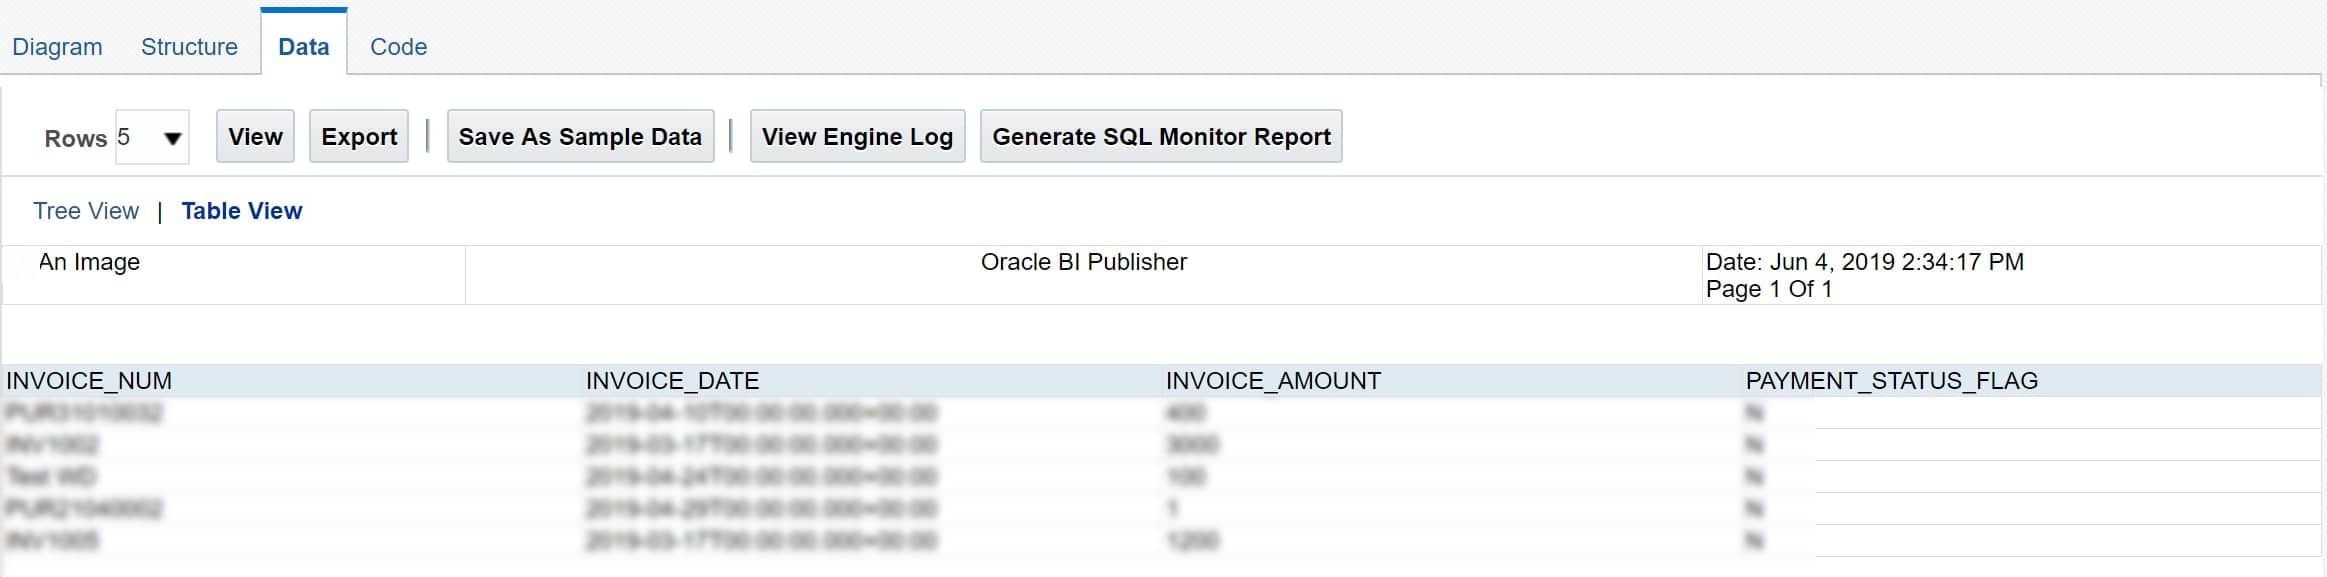
Step 9. Before we can start creating the report layout, we need to first generate some sample data to be used while in the report editor. Click on the "Data" tab, select how many numbers of rows to display (5 is usually enough, unless if you are validating data).
Step 10. Click view, then click Table View (this will generate the top 5 rows of data that are currently in the data model). If we are happy with the results, we can click "Save As Sample Data". This way, once we are in report editor, it will use these 5 rows of data to display the template layout.
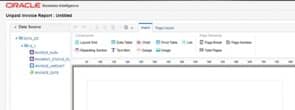
Step 11. In the report editor, click on the "insert" tab, and then drag and drop "Data Table" to the sheet. This will create a table area where you can place the columns.
Step 12. You will be prompted to save. In my example, I will save as "Unpaid Invoice Report". I will also choose to save it in the same folder as the data model.
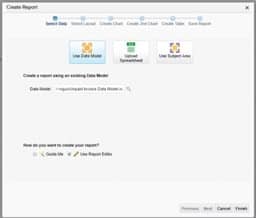
Step 13. I am selecting "Blank Portrait" as the layout in my example, but don't worry - you can change the orientation later on or choose your own.
Step 14. In the report editor, click on the "insert" tab, and then drag and drop "Data Table" to the sheet. This will create a table area where you can place the columns.
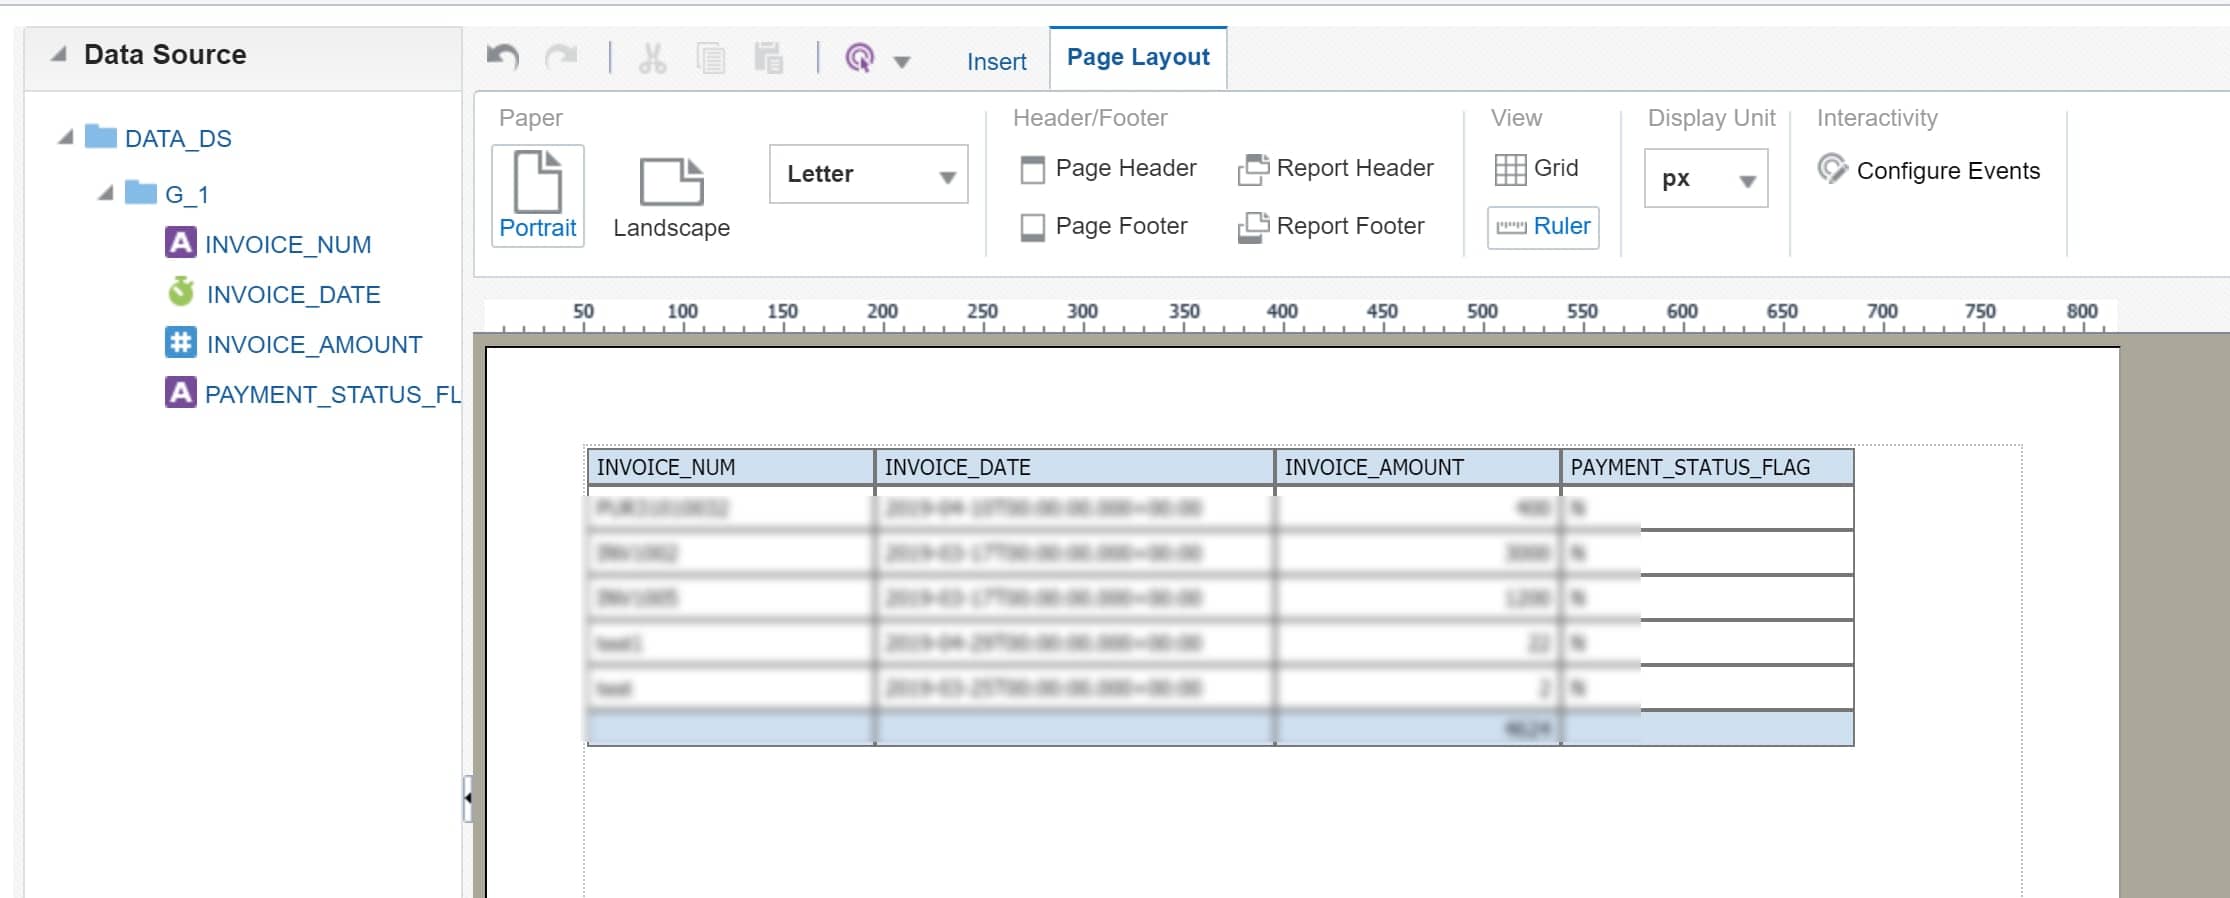
Step 15. Under the "Data Source" tab on the left, you will see all the columns that were selected through the data model. Drag and drop the appropriate columns to the table area. You can adjust the columns by dragging on the edges.
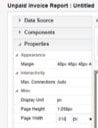
Step 16. We can also change column headers by double clicking on the field. If you want to adjust page width, you can find that under the Properties tab. Conditional formatting can be applied under "Highlight", after selecting the specific column you want formatted.
Step 17. Once you are happy with the layout and the style of it, be sure to save it.
Step 18. Because one report can have multiple layouts, it is best if you give each layout specific names to avoid confusion. To export the report, click on the clog wheel on the top right.
ORACLE FUSSION SUPPORT
Need help implementing or maintaining Oracle Fusion or BI Publisher? No worries - our consultants at Paradigm SES are well-versed in EPM software and can help your company successfully implement, troubleshoot and maintain your Oracle Cloud Services. We also offer Training.
Feel free to contact us for more information.
FREE CONSULTATION
Schedule your Free Consultation, to see it in action!
Contact Us!
We offer Autonomous Systems for EPM Cloud Applications such as Oracle Planning & Budgeting Cloud Service (PBCS/EPBCS), Financial Close & Consolidations Cloud Service (FCCS), Enterprise Data Management Cloud Services (EDMCS), Account Reconciliation Cloud Service (ARCS), Profitability & Cost Management (PCM) and more.